How to Make Crème Caramel Without an Oven: Easy Stovetop Recipe

No-Oven Crème Caramel Recipe:                A Delicious Stovetop Delight
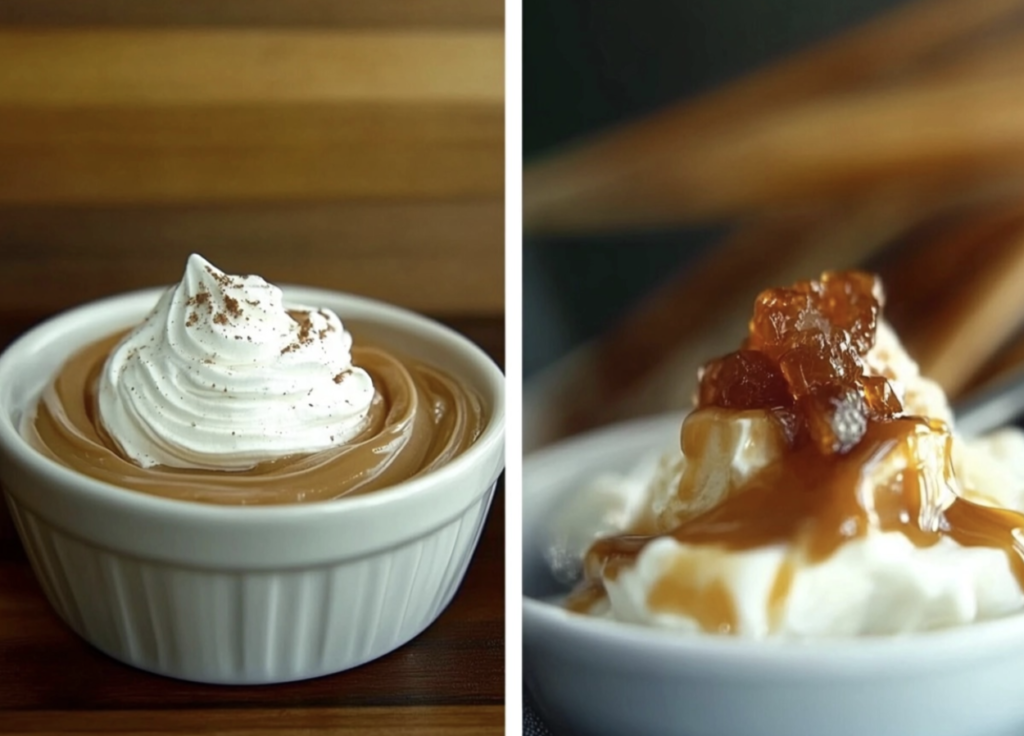
Crème caramel is a timeless dessert adored for its rich, silky texture and glossy caramel topping. While traditionally baked in an oven, this guide takes you through a hassle-free, no-oven method, perfect for anyone with limited kitchen equipment. Whether you’re hosting guests or craving a comforting treat, this recipe delivers flawless results every time.

 Why Choose a Crème Caramel Recipe Without Oven?

Making crème caramel without an oven is not only convenient but also opens the door for creative, equipment-free cooking. Perfect for dorm kitchens or homes without an oven, this method is versatile and straightforward.

Want to know more about this classic dessert’s origins? Check out the history of crème caramel to understand its enduring appeal. Additionally, mastering the art of caramel is essential for this recipe; learn expert tips on preventing caramel crystallization to avoid common mistakes.

Ingredients for This No-Oven Crème Caramel Recipe

For the Caramel:

  • 1 cup granulated sugar
  • 1/4 cup water

For the Custard:

  • 2 cups whole milk (or almond milk for a vegan option)
  • 4 large eggs (or equivalent substitutes for eggless custard)
  • 1/2 cup sugar
  • 1 teaspoon vanilla extract

Essential Tools and Equipment

  • Stovetop saucepan
  • Individual molds or ramekins
  • Whisk or fork
  • Steamer or large pot with a lid
  • Aluminum foil

Step-by-Step Instructions for No-Oven Crème Caramel

1. Prepare the Caramel

  • Heat sugar and water in a saucepan over medium heat.
  • Stir gently until the sugar dissolves and the mixture turns golden brown.
  • Quickly pour the caramel into molds, tilting each one to coat the base evenly.

Pro Tip: Avoid stirring once the mixture starts bubbling, as this can cause crystallization. For additional guidance, refer to how to prevent caramel crystallization.

2. Mix the Custard

  • Whisk eggs and sugar together until the mixture is smooth and slightly frothy.
  • Warm the milk (do not boil) and gradually incorporate it into the egg mixture while whisking constantly.
  • Add vanilla extract to enhance the flavor.

3. Assemble the Dessert

  • Pour the custard mixture over the hardened caramel in the molds.
  • Cover each mold tightly with aluminum foil to prevent water droplets from entering during cooking.

4. Cook Without an Oven

  • Place the molds in a steamer or create a water bath in a large pot by placing a rack above simmering water.
  • Cover the pot with a tight-fitting lid and steam for 30–40 minutes on low heat.
  • Check for doneness by inserting a toothpick—it should come out clean.

Learn top steaming techniques to master this cooking method and ensure your dessert cooks evenly.

5. Cool and Unmold

  • Allow the crème caramel to cool to room temperature, then refrigerate for at least 2 hours.
  • To unmold, gently run a knife around the edge of the mold and invert onto a plate. The caramel sauce will flow over the custard beautifully.

Creative Serving Ideas

Elevate your presentation with these ideas:

  • Top with whipped cream or a dusting of powdered sugar.
  • Garnish with fresh fruit like strawberries, raspberries, or mango slices.
  • Add texture with a sprinkle of crushed nuts or chocolate shavings.

Frequently Asked Questions (FAQs)

Why does my caramel turn bitter?

Bitter caramel occurs when it is overcooked. Remove it from heat as soon as it turns golden brown.

Can I substitute almond milk for regular milk?

Yes! Almond milk is a great alternative for a dairy-free version, though it may slightly alter the flavor.

How do I ensure the custard is fully cooked?

The custard is ready when a toothpick inserted into the center comes out clean, and the top feels firm to the touch.

How do I store leftover crème caramel?

Refrigerate in an airtight container for up to three days. Serve chilled for the best flavor.

Can I make this dessert ahead of time?

Absolutely! Preparing it a day in advance allows the flavors to deepen and saves you time on the day of serving.

Why This Recipe Is a Must-Try

By using a simple stovetop method, this no-oven recipe creates a luxurious, creamy dessert with minimal fuss. Whether you’re a novice cook or an experienced baker, this technique ensures a fail-proof result every time.

Indulge in the classic elegance of crème caramel today—no oven required!

The Ultimate Guide to Pillsbury Chicken Pot Pie

Overview of Pillsbury Chicken Pot Pie

Pillsbury Chicken Pot Pie is a comforting, hearty dish that combines tender chicken, a medley of vegetables, and a creamy sauce encased in a flaky Pillsbury crust. This classic recipe is perfect for family dinners, special occasions, or as a cozy meal on a chilly evening. Known for its versatility and rich flavor, Pillsbury Chicken Pot Pie is a staple in many households.

The History of Pillsbury’s Recipes

Pillsbury, a household name in baking and convenience cooking, has been crafting recipes since the 19th century. Renowned for its innovative use of dough and time-saving ingredients, Pillsbury has brought home-cooked meals to countless families. The Chicken Pot Pie exemplifies their commitment to blending tradition with ease.

Ingredients Overview

Main Ingredients for Pillsbury Chicken Pot Pie

  • Chicken: Cooked and shredded or diced, preferably chicken breast or thighs.
  • Vegetables: A mix of carrots, peas, and corn, often with optional celery.
  • Creamy Sauce: Made with chicken broth, milk, and flour or a condensed cream of chicken soup for a shortcut.
  • Pillsbury Dough: Pillsbury pie crusts or crescent rolls for the signature flaky topping.

Optional Ingredients for Customization

  • Herbs: Thyme, parsley, or rosemary for added flavor.
  • Cheese: Shredded cheddar or Parmesan mixed into the filling.
  • Additional Vegetables: Mushrooms, green beans, or sweet potatoes for variety.
  • Spices: Paprika or garlic powder for an extra kick.

Preparation Guide

Step-by-Step Instructions for Preparing the Filling

  1. Cook the Chicken: Boil, bake, or use pre-cooked chicken. Dice or shred into bite-sized pieces.
  2. Prepare the Vegetables: Dice fresh vegetables or use frozen for convenience.
  3. Make the Sauce: In a saucepan, melt butter, add flour to create a roux, and gradually whisk in chicken broth and milk. Stir until thickened.
  4. Combine Ingredients: Mix the chicken, vegetables, and sauce in a large bowl. Add seasoning and herbs to taste.

Preparing the Crust with Pillsbury Dough

  1. Roll Out Dough: Lay one Pillsbury crust in a pie dish or baking pan, pressing it to the edges.
  2. Add Filling: Pour the prepared chicken and vegetable mixture into the crust.
  3. Top the Pie: Cover with a second crust, sealing the edges by pinching them together. Cut slits for ventilation.

Cooking Methods

Oven-Baking vs. Air Frying

  • Oven-Baking: Preheat the oven to 425°F (220°C). Bake the pot pie for 30-40 minutes until the crust is golden brown.
  • Air Frying: For individual-sized pot pies, air fry at 375°F (190°C) for 15-20 minutes, checking frequently for doneness.

Tips for Achieving a Golden Crust

  • Brush the top crust with a beaten egg or milk for a shiny, golden finish.
  • Use a pie shield or foil around the edges to prevent over-browning.

Time-Saving Tips

Using Pre-Cooked Chicken

  • Rotisserie chicken or canned chicken can drastically cut preparation time.

Frozen vs. Fresh Vegetables

  • Opt for frozen mixed vegetables to skip chopping and save time. They are just as nutritious as fresh.

Nutritional Information

Calories Per Serving

  • A standard serving (1/6 of a 9-inch pie) contains approximately 400-500 calories, depending on ingredients.

Macronutrients and Micronutrients

  • Proteins: 20-25g per serving.
  • Carbohydrates: 30-35g per serving.
  • Fats: 20-25g per serving.
  • Rich in Vitamin A (from vegetables) and Calcium (from creamy sauce).

Variations of Chicken Pot Pie

Classic vs. Creamy Styles

  • Classic: Focuses on a light and simple filling.
  • Creamy: Features a richer, thicker sauce for added indulgence.

Gluten-Free and Low-Carb Options

  • Use gluten-free crust or almond flour-based dough for a gluten-free version.
  • Replace crust with cauliflower mash for a low-carb alternative.

Pairing Suggestions

Best Side Dishes for Chicken Pot Pie

  • Salads: A crisp green salad with vinaigrette.
  • Vegetable Sides: Roasted asparagus or steamed broccoli.

Ideal Beverages to Serve

  • White Wine: Chardonnay or Sauvignon Blanc complements the creamy flavors.
  • Non-Alcoholic Options: Lemonade or iced tea.

Storage and Reheating Tips

How to Store Leftover Pot Pie

  • Store in an airtight container in the refrigerator for up to 3 days.
  • Freeze individual portions for up to 3 months.

Reheating Instructions

  • Reheat in the oven at 350°F (175°C) for 15-20 minutes or in the microwave for a quicker option. For best results, avoid microwaving to maintain crust texture.

Tips for Beginners

Common Mistakes and How to Avoid Them

  1. Undercooking the Filling: Ensure the chicken is fully cooked and the sauce is thickened before adding it to the crust.
    • Tip: Simmer the sauce until it coats the back of a spoon for the perfect consistency.
  2. Soggy Crust: Avoid overfilling the pie or skipping ventilation slits in the top crust.
    • Tip: Pre-bake the bottom crust for 5 minutes before adding the filling.
  3. Uneven Cooking: Use an even layer of filling and cover the edges of the crust with foil if they brown too quickly.
    • Tip: Rotate the dish halfway through baking for even heat distribution.

Tools and Equipment Recommendations

  • Pie Dish: A 9-inch glass or ceramic pie dish is ideal for even cooking.
  • Rolling Pin: Helpful for evening out store-bought crusts or shaping your own.
  • Pastry Brush: For applying egg wash to the crust.
  • Sharp Knife or Kitchen Shears: To cut ventilation slits in the top crust.

Serving Ideas

Creative Plating Ideas for Entertaining

  • Serve individual pot pies in ramekins for a sophisticated touch.
  • Garnish with a sprig of parsley or thyme for a professional presentation.
  • Pair with colorful sides like roasted carrots or a mixed green salad.

How to Serve Pillsbury Chicken Pot Pie for Holidays

  • Use cookie cutters to create decorative shapes from extra dough to adorn the top crust.
  • Present the pie in a decorative dish or on a rustic wooden serving board.
  • Pair with seasonal side dishes like cranberry sauce or roasted Brussels sprouts for a festive feel.

Popularity and Reviews

Why Pillsbury Chicken Pot Pie is a Favorite Among Families

  • Convenience: Pillsbury crusts simplify the process, making it accessible for cooks of all skill levels.
  • Versatility: Customizable fillings allow for endless variations to suit dietary needs and preferences.
  • Comfort Food Appeal: Its hearty, creamy filling and flaky crust make it a timeless dish.

Notable Customer Reviews and Feedback

  • “The Pillsbury crust is so flaky, it tastes homemade!” – Jane D.
  • “This is my go-to recipe for busy weeknights. It’s quick, easy, and everyone loves it!” – Mark R.
  • “I tried it with rotisserie chicken and frozen vegetables—it turned out perfect.” – Susan L.

Homemade vs. Pre-Made

Advantages of Using Pillsbury Crust

  • Time-Saving: Pillsbury crusts eliminate the need to prepare dough from scratch.
  • Consistency: Achieves a perfectly flaky texture every time.
  • Flavor: Subtle, buttery flavor that complements the savory filling.

Comparing Store-Bought Options

  • Pillsbury crusts often outperform competitors in flakiness and ease of use.
  • Other brands may lack the same elasticity, making them prone to tearing during handling.

Cultural Significance

The Role of Chicken Pot Pie in American Cuisine

Chicken pot pie is a quintessential comfort food that has roots in colonial American cooking. Its ability to incorporate available ingredients into a hearty, satisfying dish made it a staple during the early days of the United States.

Regional Variations in Recipes

  • Southern Style: Often includes cream-based sauces and cornbread crusts.
  • New England Style: Features seafood or lobster as the protein.
  • Midwestern Style: Incorporates cheese and a biscuit topping.

Here are some suggestions for adding relevant outbound links to your page:

  1. Link to Pillsbury’s Official Website
  2. Link to a Nutritional Information Resource
    • Example: “Learn more about the nutritional value of chicken pot pie ingredients at NutritionData.”
  3. Link to a Cooking Techniques Guide
  4. Link to Side Dish Pairing Ideas

FAQs

Common Questions About Pillsbury Chicken Pot Pie

  1. Can I make it ahead of time?
    • Yes, prepare the filling and crust separately, then assemble and bake when ready.
  2. Can I freeze the pie?
    • Absolutely. Freeze the assembled pie unbaked; bake from frozen, adding 15-20 minutes to the cooking time.
  3. How can I make it dairy-free?
    • Substitute the milk and butter in the sauce with plant-based alternatives like almond milk and vegan butter.

Conclusion

Pillsbury Chicken Pot Pie is a versatile, comforting dish that’s simple enough for beginners yet satisfying for seasoned cooks. With its rich history, customizable ingredients, and flaky crust, it’s no wonder this dish is a favorite among families. Whether you’re preparing it for a weeknight meal, a holiday gathering, or simply indulging in comfort food, Pillsbury Chicken Pot Pie is sure to impress. Give this recipe a try and enjoy the delicious combination of flavors and textures it has to offer!

Mastering Ground Sausage: Delicious Recipes and Expert Tips

Ground sausage is a kitchen staple that effortlessly transforms simple ingredients into hearty, satisfying meals. Whether you’re crafting comforting casseroles, pasta favorites, or quick stir-fries, its rich flavor pairs beautifully with a variety of cuisines and ingredients. This versatility makes it perfect for any occasion.

Timeless Dinner Favorites with Sausage

Types of Ground Sausages

Ground sausage comes in several types, each bringing a distinct seasoning profile to the table:

  1. Italian Sausage: Available in sweet or spicy varieties, it works wonderfully in pasta dishes, pizzas, and casseroles.
  2. Breakfast Sausage: Mild and seasoned with sage, this option is perfect for morning meals or lighter recipes.
  3. Chorizo: Known for its smoky and spicy flavor, it is a favorite in Mexican and Spanish dishes.
  4. Bratwurst: Common in German cuisine, it offers a mild flavor that complements rustic dishes.

By understanding the characteristics of each type, you can choose the one that best fits your recipe.

Nutritional Benefits of Ground Sausage

While ground sausage is often seen as indulgent, it can still provide essential nutrients when enjoyed in moderation. For example:

  • Protein: Helps with muscle growth and repair.
  • Iron: Supports energy levels and improves oxygen transport in the blood.
  • B Vitamins: Essential for a healthy metabolism and energy production.

To make it healthier, you can opt for leaner varieties, such as turkey-based sausage or reduced-fat pork sausage.

Pairing Ingredients with Ground Sausage

Vegetables That Complement Sausage

Ground sausage pairs exceptionally well with various vegetables. For instance:

  • Bell Peppers: Their natural sweetness balances sausage’s savory richness.
  • Onions & Garlic: These classic aromatics enhance the dish’s overall depth of flavor.
  • Potatoes: Perfect for hearty casseroles, skillet meals, and soups.
  • Leafy Greens: Options like spinach, kale, or Swiss chard add freshness and nutrition.

Herbs and Spices to Elevate Flavor

Although sausage already contains seasonings, additional spices can enhance its taste even further. For example:

  • Basil & Oregano: Ideal for Italian-inspired recipes.
  • Smoked Paprika: Adds a bold and smoky flavor.
  • Cumin & Chili Powder: Perfect for Mexican dishes like tacos or chili.
  • Rosemary & Thyme: Excellent for hearty and rustic meals.

By combining these ingredients thoughtfully, you can elevate any sausage dish to new levels of flavor.

Classic Ground Sausage Recipes

1. Sausage and Potato Skillet Dinner

If you’re looking for a quick, fuss-free meal, this one-pan dish is the perfect choice. It combines crispy potatoes, savory sausage, and aromatic onions for a flavorful dinner.

Ingredients:

  • Ground sausage
  • Diced potatoes
  • Chopped onions
  • Olive oil
  • Salt, pepper, and smoked paprika

2. Ground Sausage Stuffed Peppers

For a colorful and satisfying main course, try these bell peppers filled with savory sausage, rice, and cheese.

Ingredients:

  • Bell peppers
  • Ground sausage
  • Cooked rice or quinoa
  • Tomato sauce
  • Shredded cheese

This recipe is great for meal prep or serving a crowd, as it can easily be prepared in advance.

Healthy Ground Sausage Recipes

1. Low-Carb Sausage Casserole

To enjoy a comforting meal without the carbs, this casserole replaces traditional starches with zucchini or cauliflower.

Ingredients:

  • Ground sausage
  • Zucchini or cauliflower
  • Cream cheese
  • Shredded mozzarella
  • Garlic powder and Italian seasoning

Not only is this dish keto-friendly, but it is also incredibly easy to prepare.

2. Ground Sausage and Kale Soup

This nutrient-rich soup is perfect for chilly evenings. It combines the bold flavors of sausage with the earthy taste of kale.

Ingredients:

  • Ground sausage
  • Fresh kale
  • Chicken or vegetable broth
  • Diced tomatoes
  • Onion, garlic, and red pepper flakes

Additionally, this recipe is versatile, allowing you to use any greens or vegetables you have on hand.

One-Pot Ground Sausage Dinner Ideas

1. Sausage and Rice Skillet

When you’re short on time, this one-pot wonder is a lifesaver. It combines ground sausage, rice, and vegetables for a complete and satisfying meal.

Ingredients:

  • Ground sausage
  • Long-grain rice
  • Bell peppers and onions
  • Chicken broth
  • Diced tomatoes

Furthermore, you can customize it by adding your favorite veggies or spices.

2. Ground Sausage Pasta Bake

For a crowd-pleasing dish, try this bubbling, cheesy pasta bake. It’s ideal for weeknights or potlucks.

Ingredients:

  • Ground sausage
  • Short pasta (penne or rigatoni)
  • Marinara sauce
  • Shredded mozzarella and Parmesan cheese
  • Italian seasoning

Simply bake until golden and serve hot!

Ground Sausage Meal Prep Tips

  1. Batch Cooking: Brown multiple pounds of sausage at once and portion them for future meals.
  2. Season Differently: Add Italian herbs, Mexican spices, or breakfast seasonings to create variety.
  3. Storage:
    • Refrigeration: Store cooked meals in airtight containers for up to 4 days.
    • Freezing: Freeze for up to 3 months and label each container for convenience.

Conclusion

Ground sausage is a versatile and flavorful ingredient that works beautifully in countless recipes. Whether you’re making an Italian-inspired pasta bake, a low-carb casserole, or a quick one-pot skillet dinner, sausage can elevate your meals with ease.

Most importantly, don’t be afraid to get creative. By experimenting with new vegetables, grains, and spices, you can tailor ground sausage recipes to suit your taste and dietary needs.

Whether you’re cooking for a busy weeknight or preparing meals for the week, ground sausage remains a reliable and delicious option. So go ahead, try something new, and enjoy the rich, savory flavors it brings to your table! 🍽️


Master the Art of Cookie Recipes: Tips, Techniques, and Delicious Variations

The Ultimate Guide to Cookie Recipes : Tips, Techniques, and Irresistible Ideas

Introduction to Cookie Recipes

Few desserts are as universally loved as Cookie Recipes. These versatile treats come in countless varieties, catering to every taste and occasion. Whether you’re an experienced baker or a beginner, mastering a few cookie recipes can elevate your baking skills and bring joy to your kitchen.

Understanding the foundations of baking is crucial for creating perfect Cookie Recipes. For beginners, baking basics for beginners is a fantastic starting point. It covers everything from mixing techniques to selecting the right tools.

Essential Tools and Ingredients for Baking Cookies

Tools for Perfect Cookie Recipes

To ensure success, equip yourself with these essential tools:

  • Mixing Bowls: Multiple sizes make preparation easier.
  • Measuring Cups and Spoons: Precision ensures perfect ratios.
  • Baking Sheets: Use parchment paper or silicone mats for non-stick baking.

Core Ingredients

Every great cookie recipe starts with high-quality ingredients:

  • Flour: All-purpose flour is standard, but almond or oat flour can be great alternatives.
  • Sugars: Both granulated and brown sugar contribute sweetness and texture.
  • Butter and Eggs: They form the backbone of most recipes, adding richness and structure.
  • Optional Add-ins: Chocolate chips, nuts, and dried fruits add unique flavors and textures.

Preserving the freshness of your cookies is just as important. Learn how to store cookies properly to keep them soft and flavorful.

Types of Cookies and Top Recipes

Popular Cookie Categories

Each type of cookie offers unique textures and flavors:

  • Drop Cookies: Easy and quick to make, like classic chocolate chip cookies.
  • Rolled Cookies: Ideal for intricate shapes and decorations.
  • Bar Cookies: Perfect for dense, layered flavors.

Top Recipes to Try

  1. Chocolate Chip Cookies
    • Classic, gooey, and timeless.
    • Variations: Double chocolate, sea salt, and vegan options.
  2. Oatmeal Cookies
    • Chewy and hearty.
    • Variations: Add raisins or chocolate chips for extra sweetness.
  3. Sugar Cookies
    • Simple and versatile.
    • Variations: Decorate with icing or add almond extract for a twist.

Tips for Baking the Perfect Cookies

Common Mistakes to Avoid

  • Overmixing: Overworking the dough can make cookies tough.
  • Skipping the Chilling Step: Chilling dough helps cookies retain their shape.

Expert Tips

  • Use room-temperature ingredients for better consistency.
  • Preheat your oven for even baking results.

FAQs About Cookie Recipes

How can I make my cookies softer?

Incorporate more brown sugar or a spoonful of cornstarch for a chewy texture.

Why are my cookies spreading too much?

Ensure your butter isn’t too warm, and always chill the dough before baking.

Can I freeze cookie dough?

Yes, cookie dough can be frozen for up to three months, making it easy to bake fresh cookies on demand.

Advanced Cookie Trends and Techniques

Decorating Like a Pro

  • Master royal icing for intricate designs.
  • Experiment with cookie stamps and edible glitter.

Trending Ingredients

  • Health-Conscious Options: Try keto or gluten-free cookie recipes.
  • Unique Flavors: Matcha and tahini are gaining popularity for their distinct tastes.

Conclusion

Whether you’re indulging in a classic chocolate chip cookie or experimenting with unique flavors, baking cookies is a rewarding experience. Armed with the right tools, techniques, and recipes, you can create desserts that delight every palate.

Get started today, and don’t forget to share your creations and favorite recipes to inspire others! Happy baking!

Crème Brûlée Recipes

The Ultimate Guide to Crème Brûlée Recipes


Introduction to Crème Brûlée Recipes

Crème brûlée recipes are cherished for their blend of simplicity and elegance. This timeless dessert, known for its creamy custard base and caramelized sugar topping, has captured the hearts of dessert lovers worldwide. Whether you’re a seasoned baker or a beginner, mastering crème brûlée recipes is a rewarding culinary journey that allows for endless creativity and customization.

Historical Origins and Cultural Significance

Crème brûlée has roots in European cuisine, with France, Spain (as crema catalana), and England (as burnt cream) claiming ties to its origin. Its simplicity, paired with its luxurious texture and flavor, has made it a beloved dessert in upscale dining and beyond.

Why Crème Brûlée is a Timeless Dessert

This dessert balances indulgence with sophistication. Its minimal ingredients, versatile flavors, and interactive caramelized topping make it a favorite for both casual and formal occasions.

Ingredients Required for Crème Brûlée Recipes

Essential Ingredients for Classic Crème Brûlée

  • Heavy cream
  • Egg yolks
  • Granulated sugar
  • Vanilla extract or vanilla beans

Substitutions for Dietary Needs

  • Dairy-free options: Replace heavy cream with coconut cream or almond milk.
  • Sugar alternatives: Use stevia, erythritol, or maple syrup for a low-sugar version.

How to Choose High-Quality Ingredients

  • Opt for organic eggs and cream for a richer flavor.
  • Use real vanilla beans for a robust, authentic aroma.

The Science Behind Crème Brûlée

The Role of Eggs in Custard

Egg yolks provide structure and richness, creating the creamy texture of the custard.

How Sugar Caramelizes

When heated, sugar melts and browns through caramelization, producing a crisp and flavorful topping.

Balancing Texture and Flavor

Achieve a velvety custard by baking at a low temperature and ensure even caramelization with consistent torching.

Tools and Equipment for Making Crème Brûlée

Basic Tools You’ll Need

  • Mixing bowls
  • Whisk
  • Fine-mesh sieve

Specialty Equipment Like a Kitchen Torch

A kitchen torch is key to caramelizing sugar evenly without heating the custard.

Budget-Friendly Alternatives

  • Use your oven’s broiler if a torch is unavailable.
  • Substitute ramekins with oven-safe ceramic bowls.

Step-by-Step Guide to Making Classic Crème Brûlée

Preparing the Custard Mixture

  1. Heat cream with vanilla.
  2. Whisk egg yolks and sugar until pale.
  3. Gradually combine the cream with yolks.

Baking the Custard to Perfection

  1. Pour mixture into ramekins.
  2. Place ramekins in a water bath and bake at low heat until set.

Creating the Caramelized Sugar Topping

  1. Sprinkle sugar evenly on top of the custard.
  2. Use a torch or broiler to caramelize.

Variations of Crème Brûlée Recipes

Chocolate Crème Brûlée

Incorporate melted dark chocolate into the custard base for a rich twist.

Fruit-Infused Options

Add fruit purees like raspberry or passionfruit for a tangy note.

Dairy-Free and Vegan Crème Brûlée

Substitute coconut cream and use a vegan egg replacer.

Tips and Tricks for Perfect Crème Brûlée

Common Mistakes and How to Avoid Them

  • Overbaking: Custard should jiggle slightly in the center when done.
  • Uneven sugar: Spread sugar uniformly before caramelizing.

Achieving the Perfect Caramelized Crust

  • Hold the torch at an angle for even browning.
  • Rotate the ramekin for consistent heat distribution.

Enhancing Presentation for Serving

  • Garnish with fresh berries or edible flowers.
  • Serve in decorative ramekins.

Nutritional Information and Health Considerations

Caloric Breakdown of a Classic Recipe

A serving typically contains about 300-400 calories, depending on portion size and ingredients.

How to Make a Healthier Version

  • Use low-fat cream or milk substitutes.
  • Sweeten with natural alternatives like honey or agave.

Allergen-Friendly Adaptations

  • Dairy-free versions for lactose intolerance.
  • Gluten-free by nature, making it suitable for celiac diets.

Pairing Crème Brûlée with Beverages

Best Wines to Complement Crème Brûlée

  • Dessert wines like Sauternes or Muscat.
  • Sparkling wines for a refreshing contrast.

Non-Alcoholic Pairing Suggestions

  • Herbal teas such as chamomile or mint.
  • Coffee for a robust complement.

How to Create a Complete Dessert Experience

Pair with a cheese platter or light fruit salad for a balanced ending.

Frequently Asked Questions About Crème Brûlée Recipes

What’s the Best Way to Store Leftover Crème Brûlée?

Cover tightly and refrigerate for up to 3 days, avoiding the sugar topping until serving.

Can You Make Crème Brûlée Without a Torch?

Yes, use an oven broiler to caramelize the sugar, though results may vary.

How Long Does Crème Brûlée Last in the Fridge?

It keeps well for 2-3 days but is best enjoyed fresh.

Exploring Regional Twists on Crème Brûlée

French Traditions and Methods

Classic preparation with vanilla beans and a creamy texture.

American Adaptations

Incorporates diverse flavors like pumpkin and bourbon.

International Variations of the Classic Dessert

  • Spain’s crema catalana with citrus and cinnamon.
  • Thailand’s pandan-infused brûlée.

Enjoy crafting this elegant dessert and delight in its versatile, indulgent flavors!


Crème Brûlée for Special Occasions

How to Customize for Holidays and Events

  • Holiday Flavors: Add seasonal ingredients like pumpkin spice for fall, peppermint for winter, or fresh berries for summer.
  • Festive Colors: Use food-safe coloring to tint the custard or sugar topping.
  • Personalized Touches: Stencil shapes on the sugar crust using powdered sugar or cocoa powder.

Presentation Tips for Formal Gatherings

  • Serve in elegant ramekins or unique vessels like teacups.
  • Garnish with edible gold leaf, mint leaves, or sugared fruits for sophistication.
  • Place each ramekin on a decorative plate with a small garnish, like a flower or cookie, for an upscale look.

Creating Themed Crème Brûlée Recipes

  • Valentine’s Day: Infuse custard with rose or chocolate and top with heart-shaped sugar designs.
  • Halloween: Use black cocoa for a spooky dark custard and orange-tinted sugar.
  • Spring Weddings: Lavender-flavored crème brûlée with pastel sugar crusts adds a romantic flair.

Common Problems and Solutions When Making Crème Brûlée

Why Does My Custard Curdle?

  • Cause: Overheating during baking or improper mixing.
  • Solution: Bake in a water bath at a low temperature and strain the custard before baking to ensure smoothness.

Fixing an Uneven Sugar Crust

  • Cause: Uneven sugar distribution or inconsistent torching.
  • Solution: Spread sugar in a thin, even layer and torch methodically, holding the flame at a consistent distance.

Avoiding a Watery Texture

  • Cause: Custard not fully set or water seeping into the ramekins during the water bath.
  • Solution: Ensure a proper seal in the water bath by wrapping ramekins tightly with foil and bake until the custard jiggles slightly in the center.

Storing and Reheating Crème Brûlée

Proper Storage Techniques

  • Cover ramekins with plastic wrap or foil to prevent fridge odors from affecting the flavor.
  • Store custards without the sugar topping; caramelize sugar just before serving.

How to Reheat Without Ruining the Texture

  • Avoid reheating the custard itself, as it can overcook.
  • Instead, serve cold and freshly caramelize the sugar topping to add warmth and texture contrast.

When to Serve Fresh vs. Reheated

  • Fresh: Ideal for special occasions to ensure the best texture and flavor.
  • Reheated (partially): Suitable for leftovers; caramelize sugar again for a fresh finish.

Conclusion: The Joy of Crème Brûlée Recipes

Summary of the Key Points

Crème brûlée is a versatile, timeless dessert with endless customization options. Its balance of creamy custard and crunchy sugar topping makes it a standout choice for any occasion.

Why Everyone Should Try Making Crème Brûlée

This dessert is surprisingly simple yet yields impressive results. With basic ingredients and some practice, anyone can master the art of crème brûlée.

Encouraging Experimentation with New Recipes

Don’t be afraid to explore new flavors, techniques, and presentations. From traditional vanilla to bold combinations like matcha and coconut, the possibilities are limitless. Each variation brings its own charm to the table.

Indulge in the joy of creating and sharing this beloved dessert, and let your creativity shine through every custard-filled ramekin!

Exit mobile version